Friday, 12 August 2016

Skechers GoTrail Ultra3 Review : TriStupe

It has been months since my last blog entry and i apologize for not being "up to date" with my postings. In fact, for the money I spent to host my URL (www.tristupe.com), I am not getting the Return of Investment (ROIs) - posting wise. Rest assured I am still very much into blogging and the reason for missing out were because of my work and travelling commitment. 
GoNew


My last review of Skechers were back in March this year where the GRR5 which was a total revamp of the previous GRR series - or to put it bluntly, a total change to how Skechers approach their products. When I received the news that I will be receiving the GoTrail Ultra3 way ahead of time, I can't wait. It was also the week that Skechers Warehouse in Malaysia caught fire, and burnt all stocks (current and yet to be launched model) up in smoke. Somehow, the pair meant for me and Deo was saved as it was sent in advance to our regular pick up point - I call it lucky!


Skechers has went on a journey of Minimalist to fully cushioned shoes. The Resalyte material continue to lend the cushioning at the midsole while the material upgrades were evident from model to model. With the Skechers GoTrail Ultra3, the game changed in terms of cushioning and stability, and down to the sole durability. Compare this to the first generation GoTrail I reviewed 3-years ago.

Back To Basic?
I was initially less than excited about the new model, as it seems Skechers is taking a step back from producing lightweight minimalist shoes that I grew very fond off. Shoes that are suitable for all foot type and are very forgiving as it doesn't restrict of forces you to change your running gait. Having used the Skechers Ultra and UltraR (or Ultra Road), I grew to like the additional cushioning it may provide especially when I run everyday, sometimes twice a day. This happen during my travels - and i truly enjoyed the stability and additional cushioning. However, the two biggest complains I have with the Ultra and UltraR are the usually softer landing, that the shoes felt sluggish, and that the soles shows wearing out pattern fast. I also learnt that despite it shows wearing out fast, it's still very much good up till 500km with no compromise on the grip (Ultra) or the cushioning (for both). Obviously, with the new GoTrail Ultra3, my expectation were somewhat "calibrated" towards lesser expectation. And I was so wrong.
GoTrail Ultra3 : Red
The color of choice this time around was Red, as the shoe before this, the GRR5 was blue. The other available color in Malaysia is Blue and Grey. My first impression as I held it in my hand was how impressively light the shoe felt despite the bulk. It sort of accentuate the Hoka series in terms of cushioning. The rated US9 size comes in at 11oz, which is similar to the UltraR. This Ultra3 seemed to carry over some feature of UltraR and improvised on a few key items. The most obvious was the outsole where it was a complete overhaul and do not have the GoImpulse Pods. The sole was harder than usual and felt very convincing for the trails in terms of grip-abilities and having large  drain/channel that will help in dispersing any mud, dirt or soil that get stuck in the trail. These deep channel also helps in providing great flexibility and potentially good transition when running. Experience tells me that these feature are important. I have written about Trail Shoes feature this in 2012, when the Brooks Cascadia5 was my all time favourite. For the record, I still have the Cascadia5, though it's super underutilized after I found the joy of Skechers.  
upclose with the Ultra 3 soles
The Ultra3 is made/designed for Ultra runs, meaning the shoe is designed for longer distance running with the cushioning and comfort via  the Ultra-class midsole design and next generation Resalyte cushioning mid-sole. One thing I noticed too, is that the shoe looked like it has a wider footprint when look from the top. The sole sort of extend outside of the shoe shape, so to say.
Tall shoe. Heel is 36mm stack. Notice the up-curve and how it extent outside of the heel cup. Evidence of wider footprint.
How does this add to the usability of the shoe? With wider footprint, it should lend more stability. This were visible when looking from the rear towards the heel cup as well. Despite the height, the Ultra3 is  4mm drop shoe. Stack height is 32-36 forefoot-heel. 
32-36 Fore-Heel stack. 4mm drop. Neutral feel.
The toebox of the Ultra3 was the next thing I noticed. it's wide. Skechers however note it as "medium" in their website. It's by far the widest I've experienced and for an Ultra and trail shoe, that is important. I was told that the Hoka may have tighter front and restrictive mid-foot wrap (anyone to verify, Hoka owner?) where else the Ultra3 felt like a welcome change. 
Wide with Reinforced toe. Notice the silver detailing which is the reflective finish
As expected, the MStrike remains standard where the Skechers Performance encourages Midfoot strike instead of heel striking. Again, the ability to run forefoot/midfoot landing has very much to do with how you are able to correct your running posture. 
What Are Those Holes On The Side?
I was looking at the side of the sole and noticed two holes on both inner and outer side of the sole. Logic tells me that it will, or should allow water to get out - and in. The position of these holes were mid of the mid-sole, and one may ask is there or how will the water logged inside can get out? 
Holes at mid of midsole. Why?
A little checking revealed that under the insole were 4-channels that will drive water out from the side.
Covered in mesh, in case sands gets in from bottom
Even the innersole or liner has holes to help express water out. The engineers at Skechers has thought of it in totality.
8 chevrons to allow water out
The upper part of the shoe is a combination of both synthetic and mesh material which lend to both durability and reduced weight. At this bulk, material engineering plays a big influence to the overall weight. 3D printed overlay lends structure and support to the shoe, giving a good fit to the foot.
Close up of the mesh
3D overlay adds to the structure
A welcomed change is the replacement of the Quick-Fit loop at the heel cup with a proper loop, which really helps pulling the shoe back up without unlacing. The tongue is about the same padded as the UltraR, which is essential for comfort in a long run or race. These small changes (loop) and consistency (tongue) is what adds to the final 10% of what gives the satisfaction to the users in my opinion. The details, it matters.
With reflective detail at back logo and loop. Nice
Use Review
The Ultra3 surprises me with the responsiveness when compared to the previous bulkier GoRun Ultra series. Everything from the toe box space, to how it fits the midfoot section, and the heel cup provide the stability. How it gives the assurance to the run both on and offroad, the flexibility and usability in all condition makes me use this for all runs since receiving this about 6-weeks ago. I've clocked close to 250km since, mostly clocked in my run when I travelled.
Street of Prague
Cobblestones of Europe with the GoRun Ultra
In the trails of Petrin Hill, Czech
And cobblestones of Prague Castle
Unfortunately, I did not manage to test this in the street of Bangalore and Manila - but they felt as good on the treadmill performing speedwork and Interval training. Not forgetting the two Running Clinics the team conducted during the period of testing. The Ultra3 has been extensively tested by Deo for his Nuang training, that he too, are convinced that this may just be "the" ultra trail shoe he will be using for his upcoming A race.
Confidence on the trail as on the road at fast switchbacks
The Ultra3 gets two thumbs up from me, and this has influenced the decision for wifey to buy one as well to replace her aging GoRun Ultra and GoRunRide4.
Last pair of US7 Grey left
Customised with laces from GoRun2 and GoRun UltraR
Note: This pair of Skechers GoTrail Ultra 3 is sponsored by Skechers Malaysia via collaboration with 2ndSkin Asia Athletes program. Thank you Skechers Malaysia and 2ndSkin! This pair is available, but limited sizing for now. Retailing at RM499 for men (Semenanjung). RM10-20 more for East Malaysia.

Saturday, 23 July 2016

Top 5 Mandatory Bike Servicing

Bike servicing knowledge is often overlooked by riders. Pushing the bike into the bike shop and let the mechanic perform the servicing does not guarantee a good servicing. On the other hand, knowing which part to service will make the bike faster than it was new. Tips of this month, team2ndskin athlete Chan Jun Shen will share some of the very important bike servicing tips which covers more than just cleaning the bike.

1. Wheel Truing


Cyclists bang into pot holes and uneven roads during training and racing, there is no way to guarantee a 100% smooth. A properly trued wheel last a long time. It also helps better transfer for energy from the frame to the ground through the wheel. The spokes are tightened and aligned by using a spoke wrench. 

2. Derailleur Tuning

A faulty derailleur gives the cyclist a lot unnecessary stress when the gear change fumbled. Get the front and rear derailleur tuned for correct shifting. A well tuned derailleur should not cause chain jump, and also able to do back pedal smoothly. In my opinion, all cyclist should learn derailleur tuning, because this is one of the most often mechanical failure occur in racing.

3. Chain Check


The life span of a chain is subject to riding environment and riding style. Most importantly, it depends on how well the cyclist maintain the chain. Some riders rides with low cadence big gears instead of high cadence low gear, so it puts a lot of strain on the links. Over time, it stretches the links and causes lost of power through poor energy transfer. One of the earliest indication is the loose links seen at the big chain ring. To better confirm this problem, Park Tool makes a very convenient chain checker. Optionally, use a ruler to measure the links. 8 links should be 8 inches long. If it is longer than 8 inches, it is time to get a new chain. Don't forget to clean it after every ride and put in new layer of lube.

4. Bearing Regreasing


There are many bearings in the bike components. Front and rear wheelset bearings, bottom bracket bearings, and pulley bearings. If rolling performance is a mandatory requirement for your PB, get everything stripped down and pump in fresh grease. A newly greased bearing will perform better than a poorly maintained bearing. I stripped down my bike, use different type of lubes and grease for different purpose. Check your OEM manual to confirm type of grease or lubes suitable for your bike parts. 

5. Torque Check


It does not matter whether your bike is a carbon or an aluminium one. There is a reason for manufacturer to etch torque requirement on the bike parts for the mechanic to comply. Putting too much stress by tightening the bolts too much can cause crack in the bike parts. A good engineering practice always impart mandatory torque check to ensure the bolt properly secured, not too lose and not overtighten. 

One of the best example, 5Nm to tighten the stem. Very often this reading goes unnoticed. 


Hope this tips helps=) A well maintained bike is a safer bike. 
Stay tuned for more monthly tips from team2ndskin.


Monday, 23 May 2016

Kerian International Duathlon 2016 - Team Athlete Chan Jun Shen Race Report

Kerian International Duathlon is the race which I signed up and forgotten about it after a while. I am just too occupied with my work at Air Wing, I hardly have any time to check for races. Every time I log on to my pc, I will sign for multiple races. The very same weekend, I have Garmin Clinic and also OP Running Clinic on Saturday morning. How am I gonna split myself like an amoeba and be at 3 places at the same time? I managed to merge the OP Running Clinic and Garmin Clinic, it turned out to be the right decision! Killed two birds with one stone. I drove back from Lumut to KL. I woke up to a rainy (no thunderstorm) Saturday morning, the Garmin clinic participants' attendance was around half of the class' strength! Well, not all runners are "All Weather Runner". Thanks to all the OP Running Clinic participants who filled up the lists and made the clinic really happening. The HIIT session mainly focuses on the program, running dynamics and benefits of understanding the data in Garmin devices. We concluded the clinic at around 1030H, I called up a few friends to pick up my race kit in Kerian just in case I can't make it in time.

Sharing with the participants on High Intensity Interval Training.
Pics courtesy Limite Art. 

3 hours of self driving is so boring! I came to KL from Perak and in less than 24 hours I am heading to Perak again. I met my UPNM juniors at their homestay and collected my race kit from them. Not knowing what to do, I conducted a 3 hour triathlon training class to kill time.
 During my cadet years, my seniors were not very knowledgeable, not many truly understood the training data given by heart rate monitors. Bike fit knowledge was almost zero. But they were a bunch of awesome seniors who guided me with all the knowledge that they had, whatever they had to offer me, they made sure to get it delivered to the juniors. Prior to my maiden Long Course Triathlon, I only knew that I will be bulldozing over 2.1km open water swim (like washing machine), 90km of cycling and finish up the race with a 21km run. Little that I know that aero bar is so important. My senior Kapten Salman and the gang, helped me to find an aero bar and got it fitted on my bike. Later on they got commissioned, the last word they told me, "Chan, jaga kelab kita baik-baik". Now that I am already a 5 X Ironman Finisher, whenever I meet the UPNM juniors, I will teach them and bring their knowledge to the next level. 

Setting up their bikes before sleep. 

My initial plan to camp in the car got cancelled as the juniors invited me to stay overnight with them. In return, I paid for the whole team's dinner. As the night fall, the mosquitoes flew in stealth and quiet like the B2 bombers without us realizing and started the "blood donation campaign". After setting up the mosquito netting (I carry mosquito netting in my car) in my room, I dozed off really quick. To my surprise, I did not feel any pre race jitters. Knowing that this race is full of potential winners, I do not see myself competing at the first pack after two weeks of disappearance from the training ground.   
How the cadets sleep. Save money for more future races, so we cramp together in a homestay. No complain, this is much more comfortable than sleeping under the poncho.  
RM50k worth of bike equipment in a kitchen.

0500H, I can't remember the last time I got awaken by the rooster because we do not have rooster in the Naval Base! If the rooster make noise in the morning, those desperate survival training trainees would hunt them down and make them KFC in the jungle. This time, I find it really annoying. Haha. The rooster never stop making noise every single minute! By 6am, I was already at the race area setting up my transition. 0700H flag off, huge crowd sprinting in the front pack. I was just running at my own sweet pace around 4.10mins/km along the straight long stretch next to the waterway. The top 10 gone missing by kilometer 4, I couldn't see them despite the straight stretch! A few UPNM cadets were chasing the front pack with their impressive running speed, not sure how long are they gonna last though. My transition was a quick one, fly mounted and caught a few UPNM cadets who ran ahead of me. They should really buck up their transition skills. Until now, no drama yet. 
Average pace : 4.06mins/km
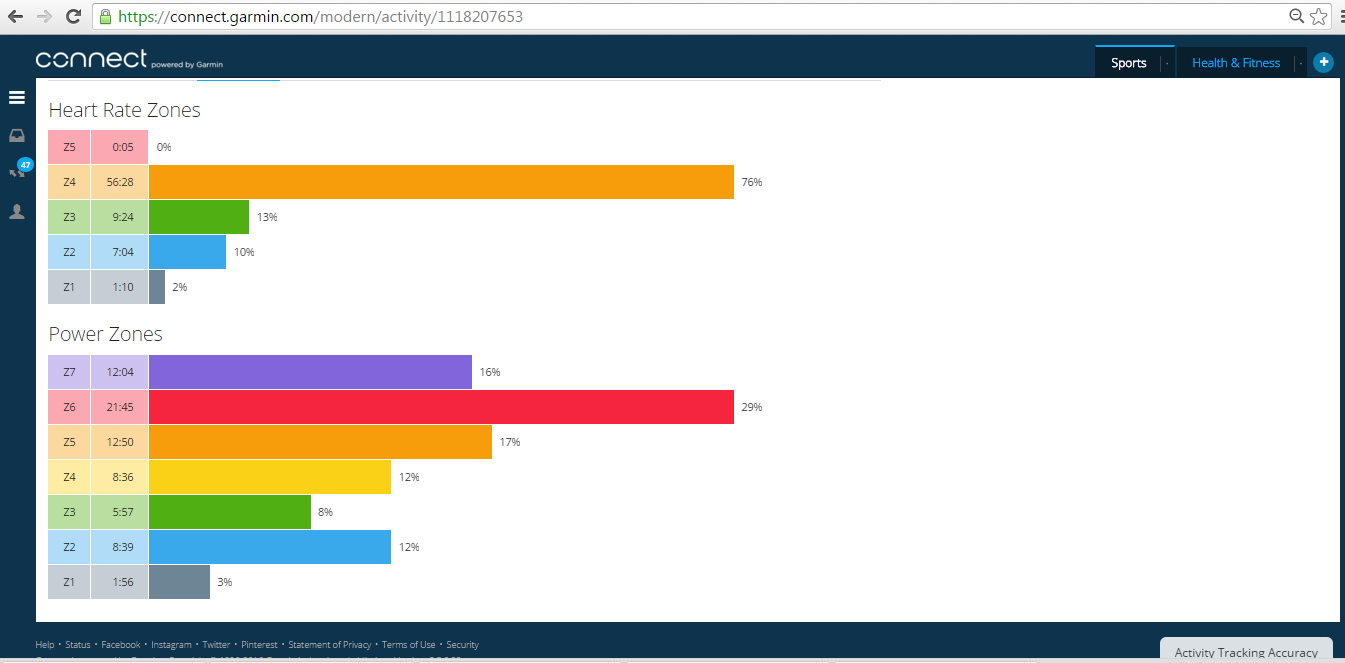
My Garmin Connect data shows a good pace management with no significant pace drop, the heart rate was at Zone 5 for 94% of the time to keep my high cadence of 174spm and good stride length. To my surprise, my average stride length is 1.42m, my height is only 1.62m so it is already 88% of my height! My stretching shows significant improvement in my flexibility and agility.  
Flat and long running route.

40km of cycling on a flat terrain sucks. I never liked flat courses because I will be beaten by the super bikers on their TT bike, I rather climb hills. First 20km, I rode with the UPNM cadets. We took turn to pull before Richard Tang blazed past us with no mercy. He is another veteran with balls of steel, one aggressive rider! Got off the saddle and drop a few gears to bridge the gap. Then the Sungai Udang Commandos overtook us, trying to command the peloton but nobody bothered. By now, more than 20 riders in the peloton but only 10 power horse. The rest were suckers. Two young 16 years old riders really have the cycling legs, I even thought they represent Malaysia in Duathlon. 10 more kilometer to the transition, Sayuti smoked my peloton and then Fariz came by with a huge "ATRAZ" on his backside. Cut short the long story, my peloton is a tortoise peloton with a few riders who NEVER pulled the peloton throughout the race. I entered the transition with 20 over riders! As I fly dismount and pushed the bike, the muddy entrance got so congested that my aerobar stuck to Fariz's back bottlecages. Hahaha. 
Average pace : 36.8km/h


The fluctuating pace caused by the confusing moves of riders in my peloton. 84% of the time I was riding in Zone 4 heart rate and 16% in Zone 5. Pretty intense. The race was too fast for me to look at my watch, my focus was to stay accident free and stay with the pack. 
 Flat course and no flat tyre. Thank god. 

The cramping tingling feeling started as I ran out of the transition area. Oh Not This Time Please! Shorten my stride a little while maintaining good cadence, stay focused and keep the cadence high. Please don't cramp now! I saw a few UPNM cadets in front of me, but I just couldn't catch them. I burped all the time because of the feeling of throwing up. My diaphragm started to cramp which further restrict my breathing. Kilometer 4, the breathing starts to get more synchronized with my running rhythm. It doesn't get any easier though, because I wanna chase down the UPNM cadets! Hahaha. Kilometer 6 on wards, I pumped my arms to keep the legs going. I am really lack of training, that is why I suffer so much. Padam Muka. When I approached the finishing arch, I didn't know if I will make it to podium. Then Razlan the commentator shook my hand and said "Hey Congratulations Bro, You're No 5!". 5th placing is the very last spot for podium. 
Average Pace :   4.29mins/km

 Picture Courtesy SpeedDemon TM.

 The fluctuating heart rate and stride length was caused by my "Cramp Symptom Damage Control". My average stride length dropped a little compared to my first run, but still it was a good run of 1.25m. Cadence is still under control, averaging 180spm. 65% of Zone 5 and 36% of Zone 4. I gave everything I have. 

 Razlan announced my name to collect my Men Open 5th placing prize. "Chan Jun Shen, a proud product of UPNM and bla bla bla...". Out of nowhere the tears start brewing (not because of winning the race). Knowing Razlan for so long, he has been the one who announce my finish since my RMC and UPNM triathlon races. So when he said "proud product of UPNM", I felt a bit touched to recall how far have I come. I wouldn't say UPNM is the best place to study, but UPNM made me into who I am today. I did Ironman during my cadet years to relieve some of my stresses I got from the regimental routine, it was triathlon who saved me from quitting. We had Instructors who scored flying colours in courses and also another bunch who were put in "cold storage" for disciplinary action. Life was never peaceful for us. So I always tell the juniors, never give up in delivering the best of our ability as a young officer. Kelab Sukan Lasak UPNM has a very special place in my heart.


 Another podium finish for this year. 
Group photo with the UPNM Cadets.


Working is not an excuse for not being competitive. I highly recommend this race for athletes from all level because of the well marshalled roads and clear signage, ample water stations and punctual race start. The fees is relatively cheap compared to other Malaysia Races so you should expect huge crowd with lots of fast athletes come to test their power.

Tuesday, 19 April 2016

Garmin Vector 2S Review - Tri Stupe

An extended write up from Tri Stupe on Garmin Vector 2S after Jun Shen's previous entry. Both of them have been comparing notes and this time around, Stupe provide a more lengthy entry touching on installation of the unit and a few important metric for Power training. Here you go!


For cyclist or triathlete, training using Heart Rate Monitor or HRM seems outdated with the availability of "more affordable" power meter. Power meter can cost a fortune especially when you factor in the pricing of the bike and gears you already invested in this (already very expensive) sports. Why aren't HRM enough? Like many others, I've toyed with the idea, and wished I could afford one - or rather, for the technology to be more affordable so it's possible to get one, or two (or depending on how many bikes you may have ;-))

Vector 2S
Athletes comes in all different level of fitness and capabilities. Even ourselves, our heart rate differs everyday depending on our rest, performance and even the weather. So, to be training at "10 beat per minute" more than yesterday may very well meant different level of effort if you had a tough day or an easy day (at work or at training). However, having a consistent benchmark such as power, which is a function of force multiply by distance over time. It sort of provide a number where you can use to benchmark your training against. The level to generate 100Watt (W) when you are fresh or tired is the "same" to the power meter. But to get your heart to work to generate that 100W when you are tired, may meant busting your heart rate at Lactate Threshold than when you are fresh. 
An analogy I could use would be to compare Heart Rate to a vehicle RPM while Power is the capacity. A car going uphill may require higher RPM (HR) to generate the same climbing power and definitely lesser RPM (HR) when you are moving on a flat ground. Now imagine if you can train at a given Power irrespective of your HR... you will become a more efficient cyclist or triathlete!

Garmin Vector 2S
Lucky for me, the good people in AECO Technologies, which is the authorized distributor of all Garmin products in Malaysia has been kind to provide myself and Chan a unit of their latest power meter to be used for our training. Chan has provided a write up on why in the team's blog. We both have been using the Vector2S and has compared a few notes on training. Among others, we soon found out that I can churn out more power compared to him. Question was - am I a stronger cyclist because I can fire up higher power? Now keep this question in mind while I continue today's review of the 2S.
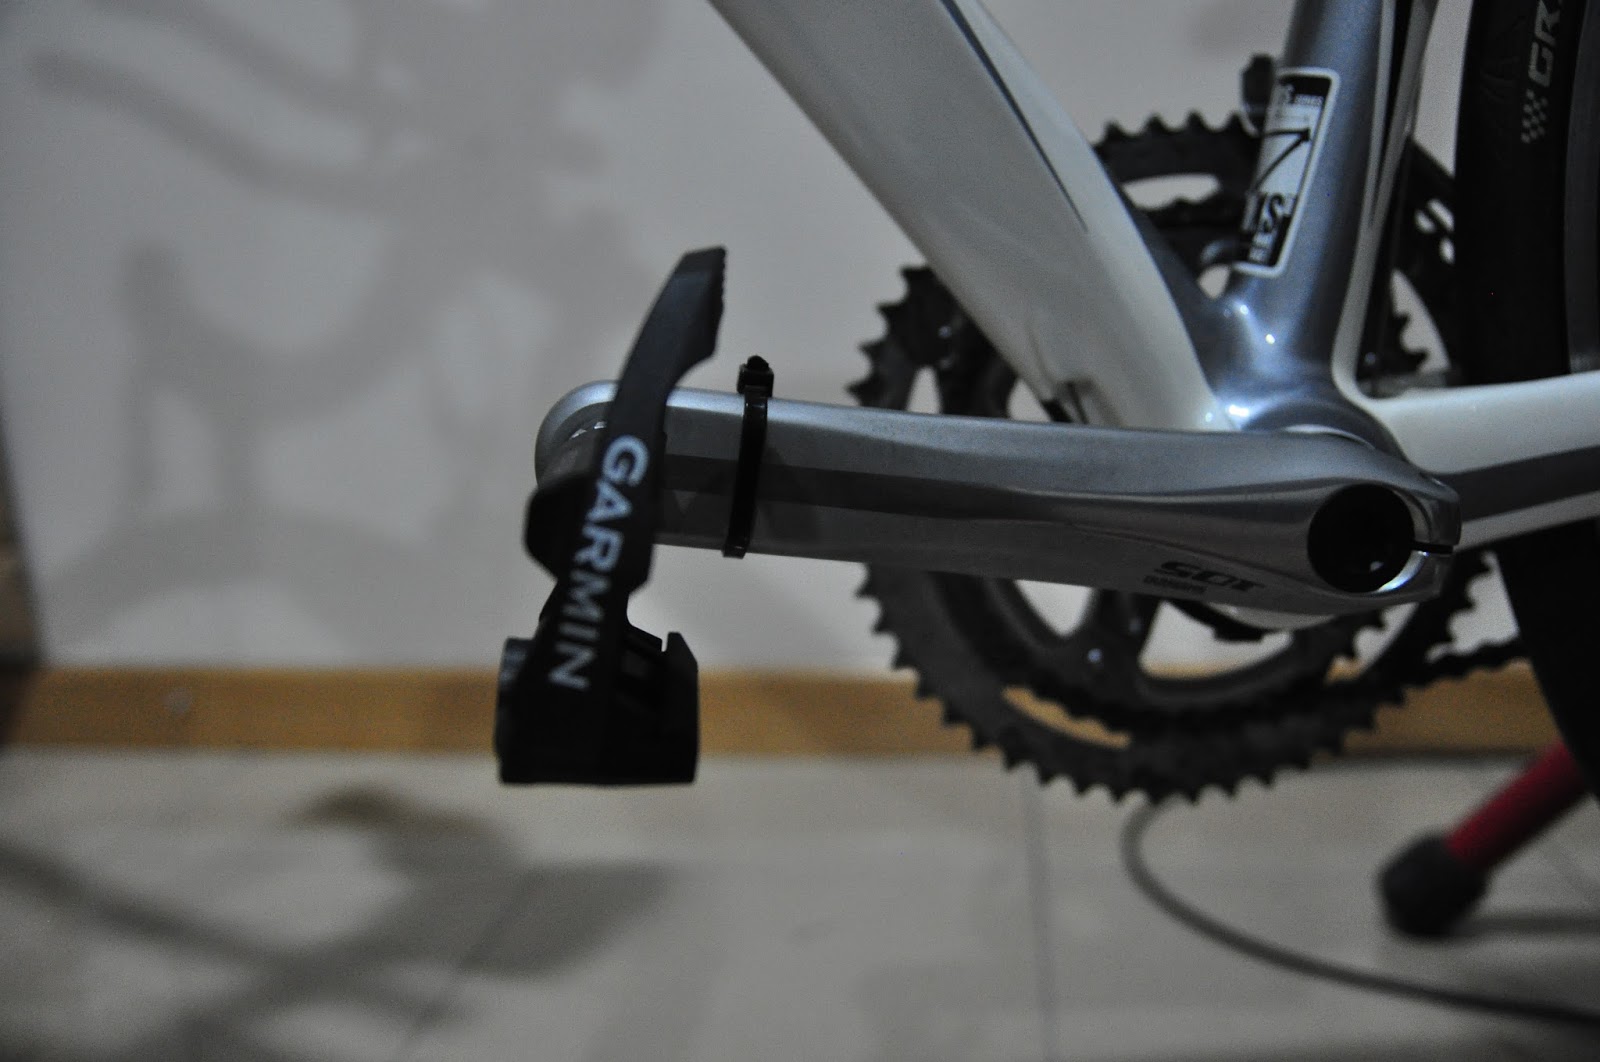
First up is the Garmin Vector 2S itself. It is a pedal-mounted power meter. Other variations available in the market (for power meter of other brands) are crank mounted, bottom bracket mounted, hub mounted and crank-spider mounted. My exposure and knowledge was nil until the Garmin Vector 2S. This review will be specific for Garmin Vector 2S; until I manage to (afford???) another different type to compare. 
The Garmin Vector 2S (I will call it 2S from now onward) is an upgrade from the original Vector where the older pod appears to be a ring (O) that goes through the bike spindle versus the newer Vector that has the pod coming as a clamp (()). The plus side? Easier installation. Meaning, You can remove the pedal and re-install it on another bike faster and easier. Ideally, I would think for such investment, you may unlikely remove the pedal and the pod. That is unless you decided to do so (or use a different bike setup like a road bike vs a TT bike) for race reasons. 
The closer look of the Pod clamp
Vector 2S is single sided pod aka on the left pedal while the full fledged Vector 2 is both pedal - which gives you better left-right accuracy where power generation is concerned. On the "left" only power meter such as 2S, the total power are multiplied to provide the reading. While some of you may now argue the accuracy of a one-sided unit - I believe manufacturer like Garmin would had factored in this when building the algorithm to compensate or to correct the readings. For that, Garmin units has function of "Smoothness" in percentage (%) which could mean how smooth your pedaling motions are, and these translate to efficiency. 


Tuesday, 12 April 2016

Why Should I Get A Garmin Vector 2s Powermeter - Team2ndskin Athelete Chan Jun Shen


The technology to assist athletes in improving performance has gotten to a very advance state. The invention of heart rate based training monitored by the chest strap heart rate monitor seems so yesterday compared to the new optical heart rate offered by Garmin Fenix 3 HR, Garmin Forerunner 225 and so on. All upgrades can be made, having another latest innovation in our race gear inventory is good, but how many of them provide USEFUL data in our training. After all, data is useless if not interpreted into information for us to digest. Recently Garmin Malaysia in collaboration with team2ndskin provided Tri Stupe and I a set of Garmin Vector2s, a powermeter. Installation was brisk, simple and no mess. Plenty of video available on Youtube.

More than a month after training with powermeter, I told myself that I should have gotten it long time ago. To put it in a simpler word, cycling with a speed cadence sensor and heart rate monitor only tells me how hard was my heart pounding and how fast was I going. Somehow riding on an indoor trainer does not accurately translate the power out from my legs to the pedal. I would not know how hard I was pedaling. In most races, heart rate and speed is not enough to measure my effort. In windy and hilly condition, I would be riding slower. There are so many unmeasured parameters. By having a powermeter, all the data I can ever imagine is being transferred to my Garmin Forerunner 920xt providing all the necessary information.

The Data that I have in my Garmin Forerunner 920xt is :
Heart rate, avg heart rate, max heart rate, %HRR, training effect, time in zone, avg speed, max speed, avg power, cadence, avg bike cadence, max power, max avg power (20min), normalized power, Intensity factor, Training Stress Score, Functional Threshold Power, Calorie burn and many many more!


To start off with a power meter, learn this 3 things :
Functional Threshold Power :
Maximum power you can maintain while the body can still remove lactic acid. Similar to 1 hour time trial effort.

Field Test :
Achieved through a 15 minutes warm up, followed by 20 minutes of time trial. Resulted Power output is the Functional Threshold Power.

Training Stress Score :
TSS is a measurement of workload as a function of duration and intensity. The harder and the longer you ride, the higher the score.

#click this LINK for more reference. Training peaks did a great job in explaining! =)

To analyze yourself with another athlete:
Watt/Kg solves all the kiasu issue. Divide your wattage with your Weight in kilogram, let say my average power output is 178watt and my weight is 56kg. So my Watt/Kg = 3.18Watt/Kg. Another rider weighing 80kg is hammering the pedal with the power output of 200watt. So his Watt/Kg = 2.5Watt/Kg. So I would be faster on the road for having 3.18Watt/Kg compared to his 2.5 Watt/Kg. This is much more accurate than comparing average speed with other riders riding in other environment.

These are the very basic information gained from powermeter, the best ever investment made in cycling gears. The information given is a key to better understanding of training effort. Never too late to get one! This Garmin Vector 2s is upgrade-able to Garmin Vector 2 which measures power on both sides of the pedal! More information means better training quality=)